Chat Application With ASP.NET MVC Using RabbitMQ
In this article, you will learn how to develop a chat application in ASP.NET MVC using RabbitMQ. First, you need to download RabbitMQ and OTP.
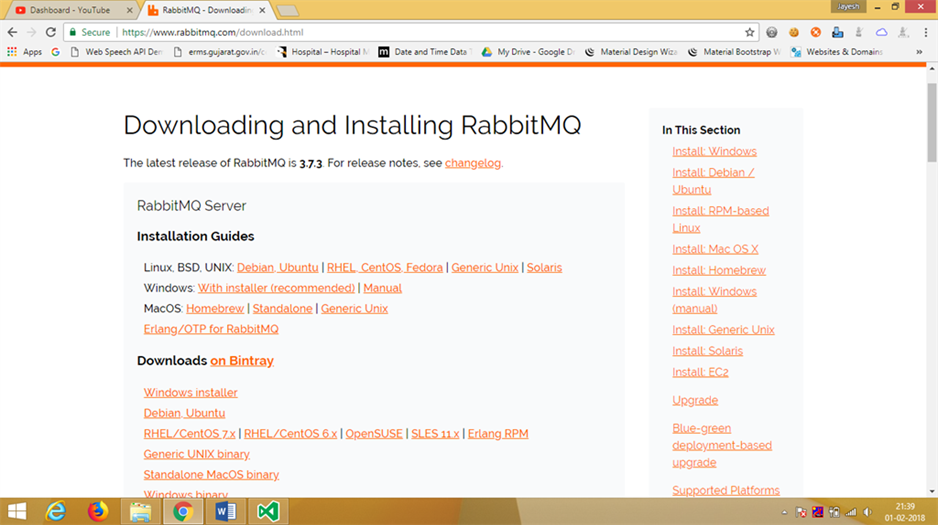
Step 1: RabbitMQ
https://www.rabbitmq.com/download.html
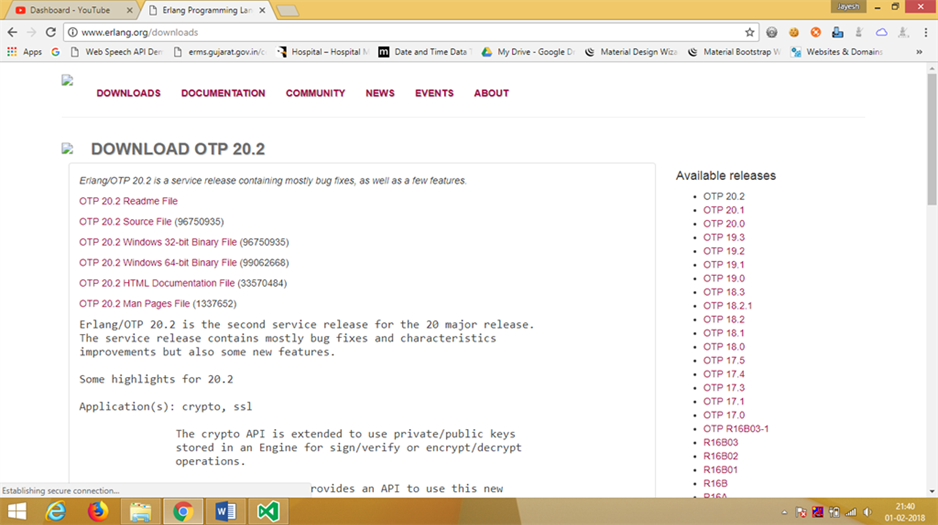
Step 2: OTP
http://www.erlang.org/downloads
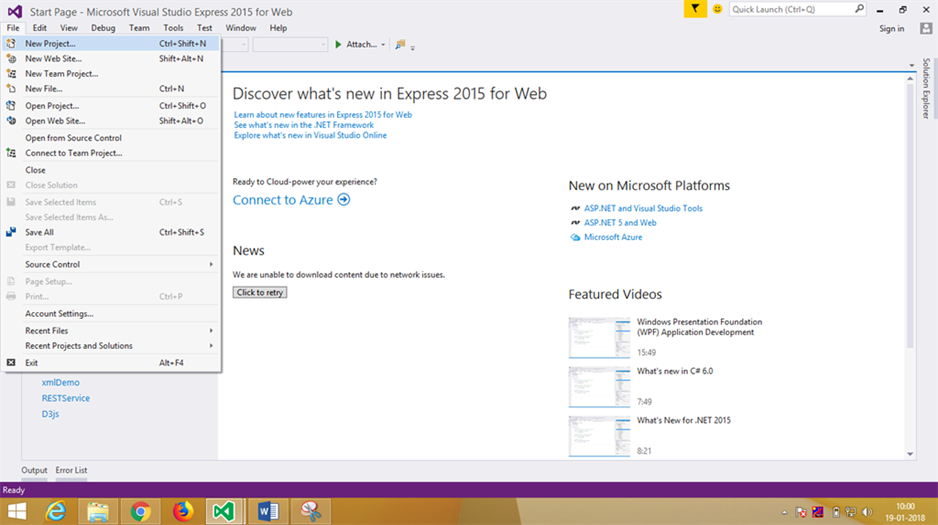
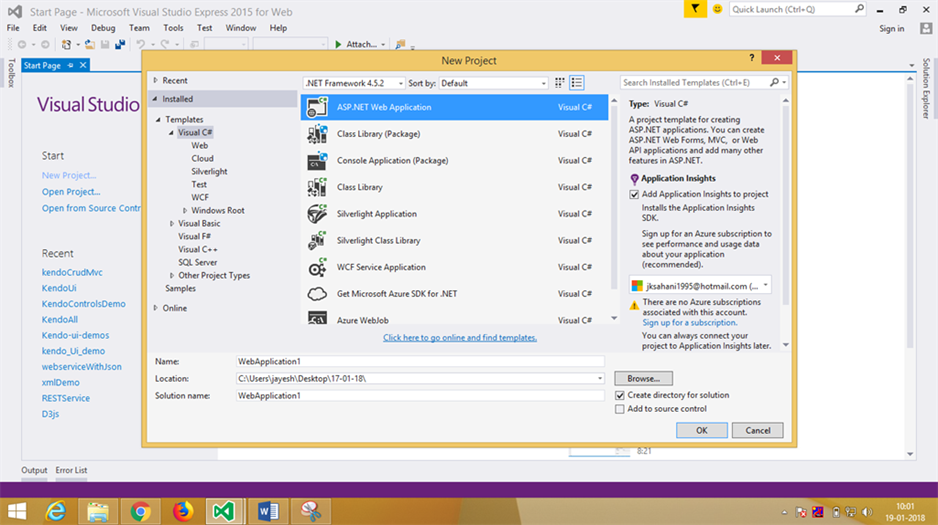
Create a new MVC project.
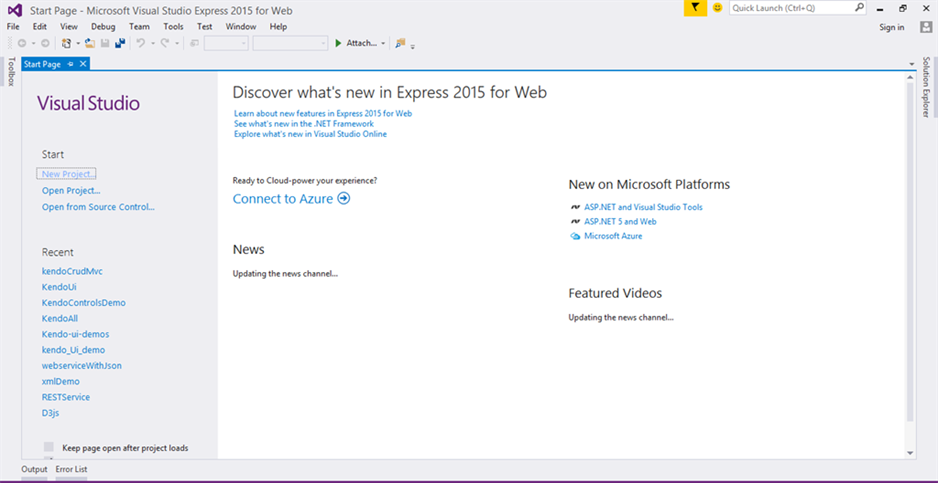
Step 3: Open Visual Studio
Go to File menu and select New Project->Web application->MVC.
From New Project, select ASP.NET Web Application and click OK.
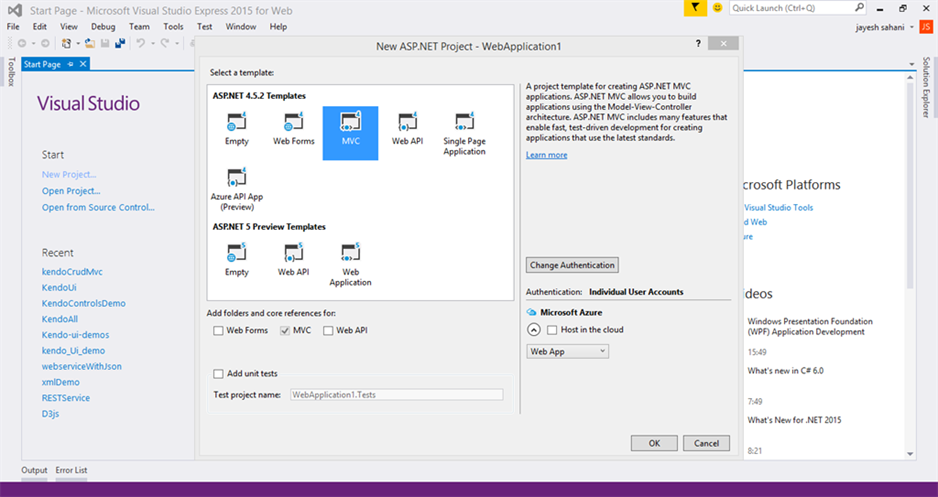
Select MVC and click OK.
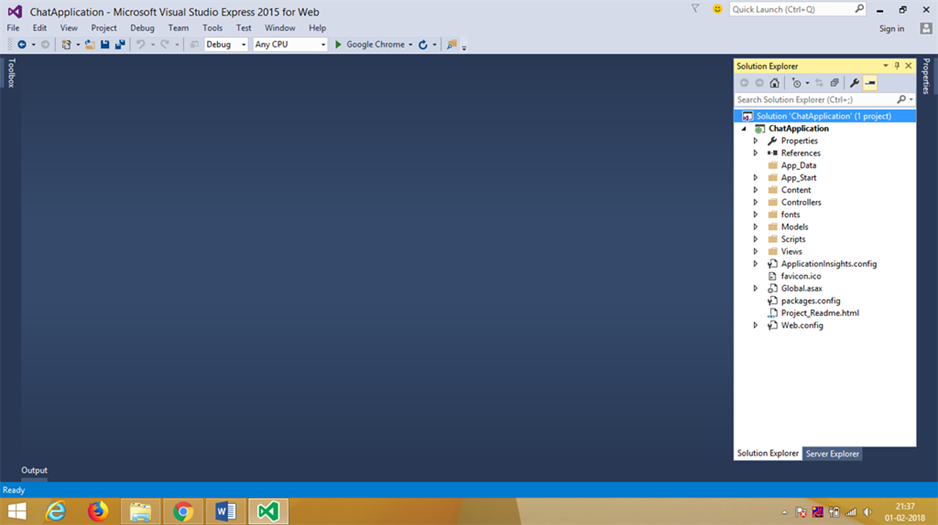
In Visual Studio, the folder structure is shown as below in the Solution Explorer for the chat application.
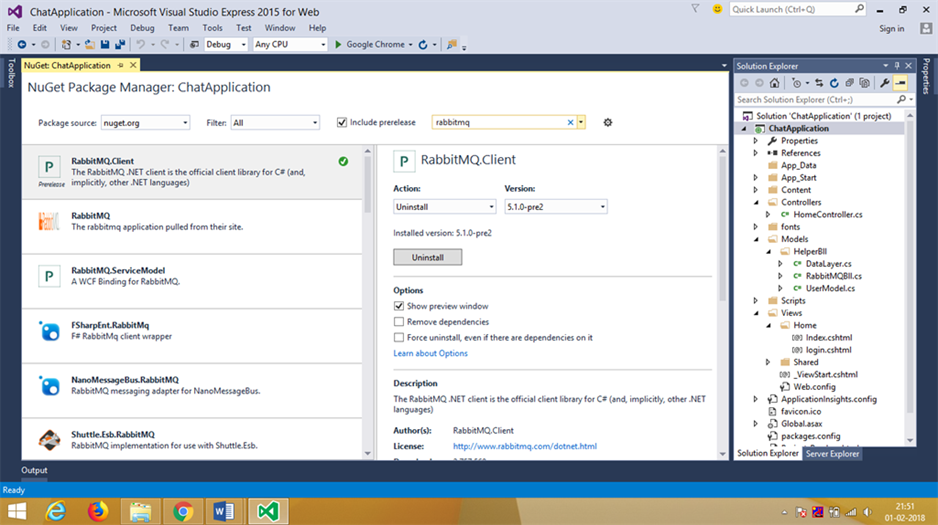
Right-click on Project and select “Manage NuGet Packages..”.
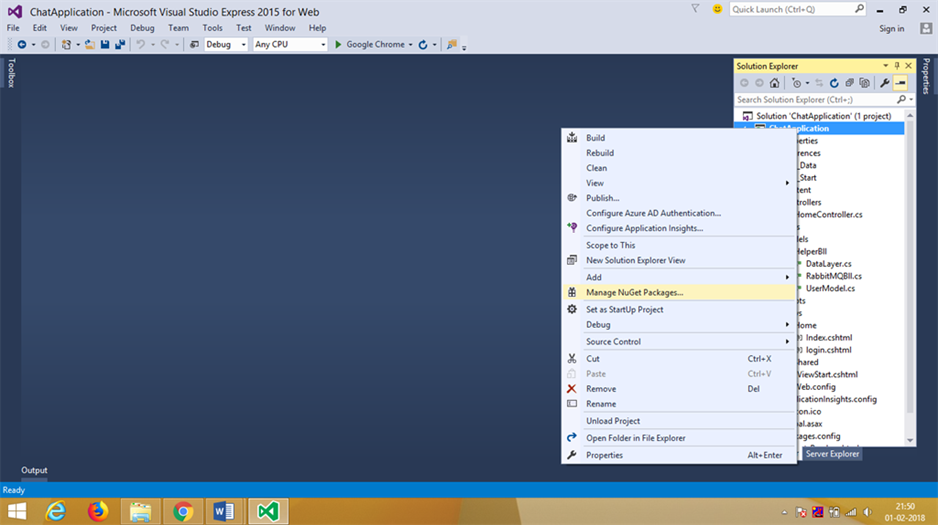
Search Rabbitmq and install the rabbitmq.client package.
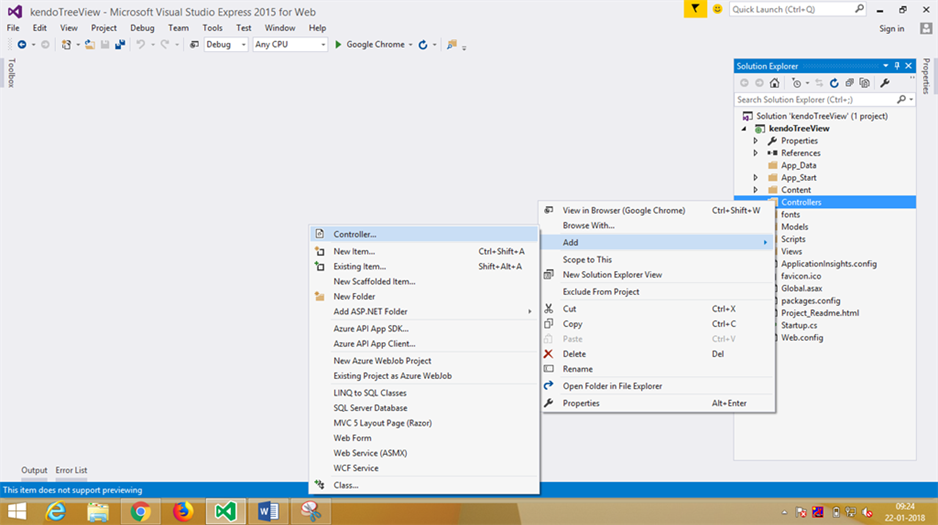
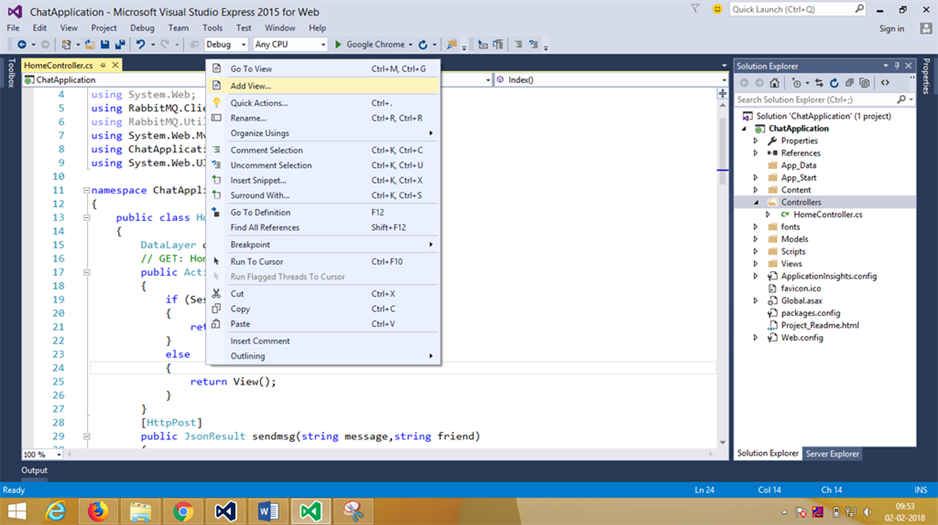
Adding new HomeController
Right-click on Controllers folder, click Add >> Controller.
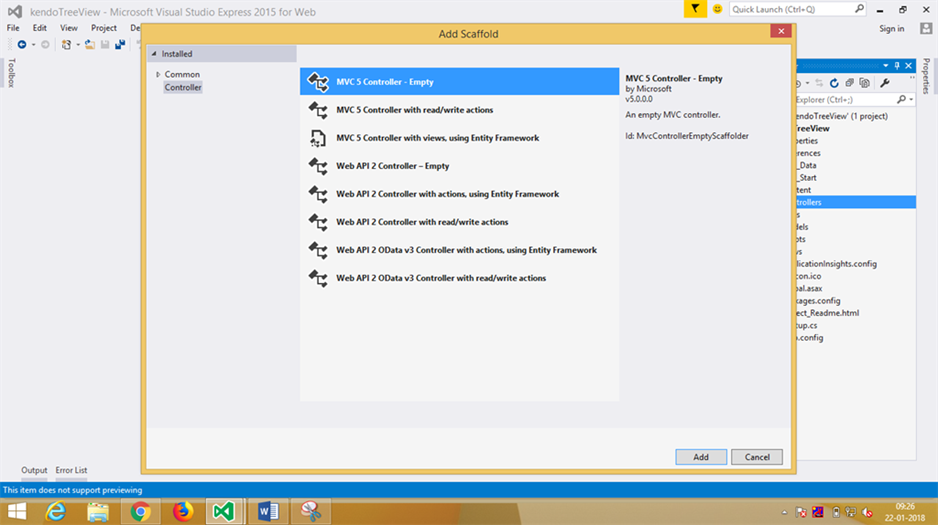
Once the user selects the controller, the “Add Scaffold” dialog gets opened. Select MVC 5 Controller – Empty and click “Add” button.
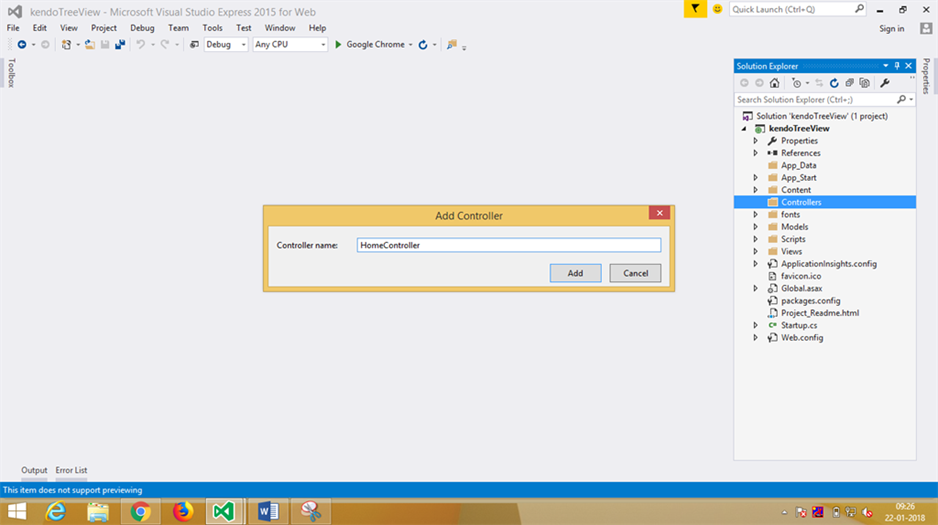
Give Controller a name (HomeController) and click “Add”.
Once the user clicks on Add button, the Workspace will be opened to write the code.
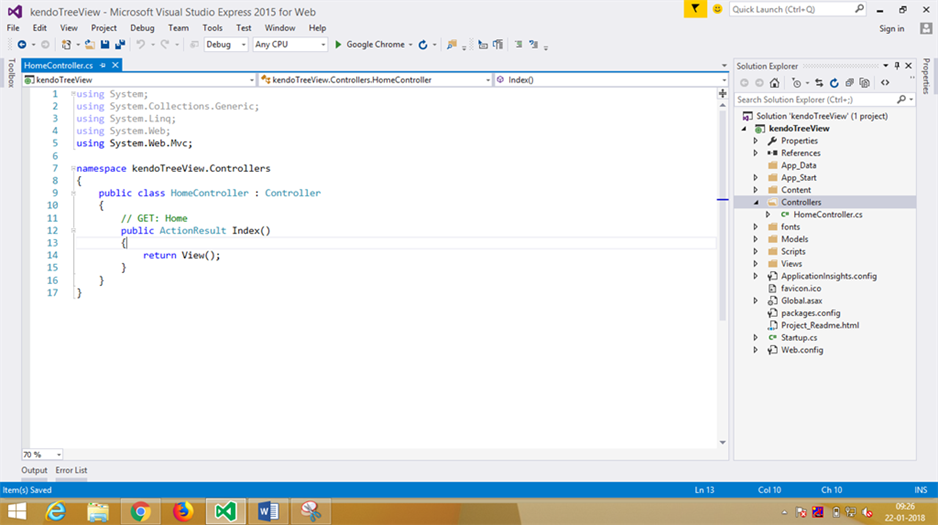
Paste the below code in HomeController.
- using System;
- using System.Collections.Generic;
- using System.Linq;
- using System.Web;
- using RabbitMQ.Client;
- using RabbitMQ.Util;
- using System.Web.Mvc;
- using ChatApplication.Models.HelperBll;
- using System.Web.UI.WebControls;
- namespace ChatApplication.Controllers
- {
- public class HomeController : Controller
- {
- DataLayer dl = new DataLayer();
- // GET: Home
- public ActionResult Index()
- {
- if (Session[“userid”]==null)
- {
- return RedirectToAction(“login”);
- }
- else
- {
- return View();
- }
- }
- [HttpPost]
- public JsonResult sendmsg(string message,string friend)
- {
- RabbitMQBll obj = new RabbitMQBll();
- IConnection con = obj.GetConnection();
- bool flag = obj.send(con, message,friend);
- return Json(null);
- }
- [HttpPost]
- public JsonResult receive()
- {
- try
- {
- RabbitMQBll obj = new RabbitMQBll();
- IConnection con = obj.GetConnection();
- string userqueue = Session[“username”].ToString();
- string message = obj.receive(con, userqueue);
- return Json(message);
- }
- catch (Exception)
- {
- return null;
- }
- }
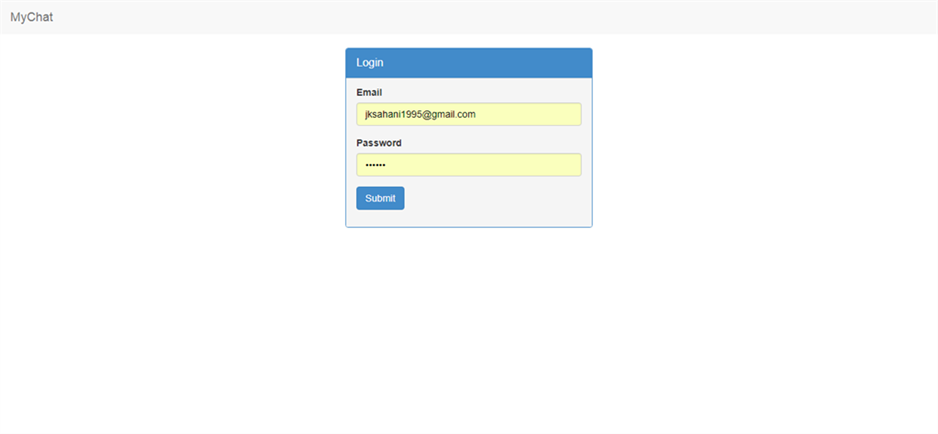
- public ActionResult login()
- {
- return View();
- }
- [HttpPost]
- public ActionResult login(FormCollection fc)
- {
- string email = fc[“txtemail”].ToString();
- string password = fc[“txtpassword”].ToString();
- UserModel user = dl.login(email, password);
- if (user.userid > 0)
- {
- ViewData[“status”] = 1;
- ViewData[“msg”] = “login Successful…”;
- Session[“username”] = user.email;
- Session[“userid”] = user.userid.ToString();
- return RedirectToAction(“Index”);
- }
- else
- {
- ViewData[“status”] = 2;
- ViewData[“msg”] = “invalid Email or Password…”;
- return View();
- }
- }
- [HttpPost]
- public JsonResult friendlist()
- {
- int id = Convert.ToInt32(Session[“userid”].ToString());
- List<UserModel> users = dl.getusers(id);
- List<ListItem> userlist = new List<ListItem>();
- foreach (var item in users)
- {
- userlist.Add(new ListItem
- {
- Value = item.email.ToString(),
- Text = item.email.ToString()
- });
- }
- return Json(userlist);
- }
- }
- }
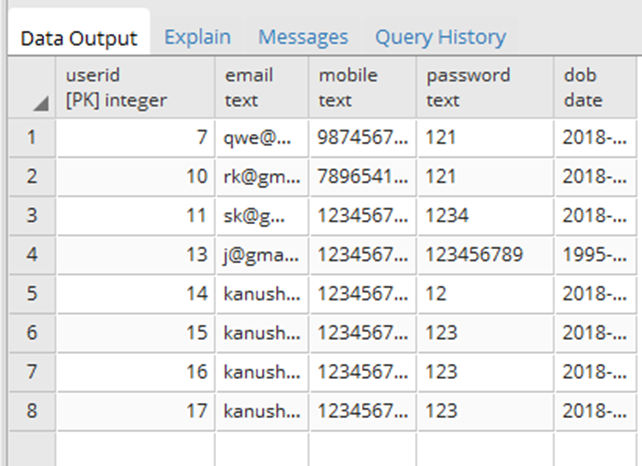
Create a table in the database (PostgreSQL).
Below is the query to create a table.
- CREATE TABLE public.tbluser(userid integer NOT NULL DEFAULT nextval(‘tbluser_userid_seq’::regclass), email text COLLATE pg_catalog.
- “default”
- NOT NULL, mobile text COLLATE pg_catalog.
- “default”
- NOT NULL, password text COLLATE pg_catalog.
- “default”
- NOT NULL, dob date NOT NULL, CONSTRAINT tbluser_pkey PRIMARY KEY(userid))
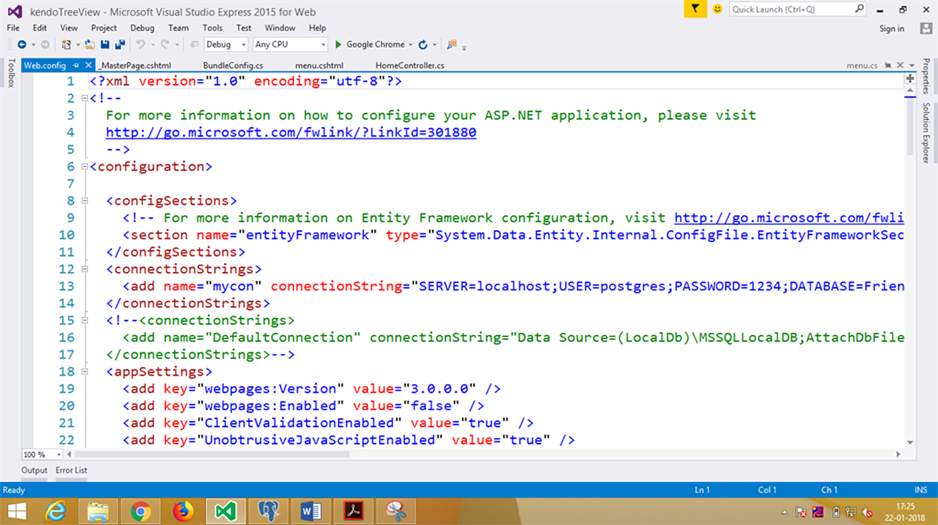
Insert the connection string in web.config file in ASP.NET.
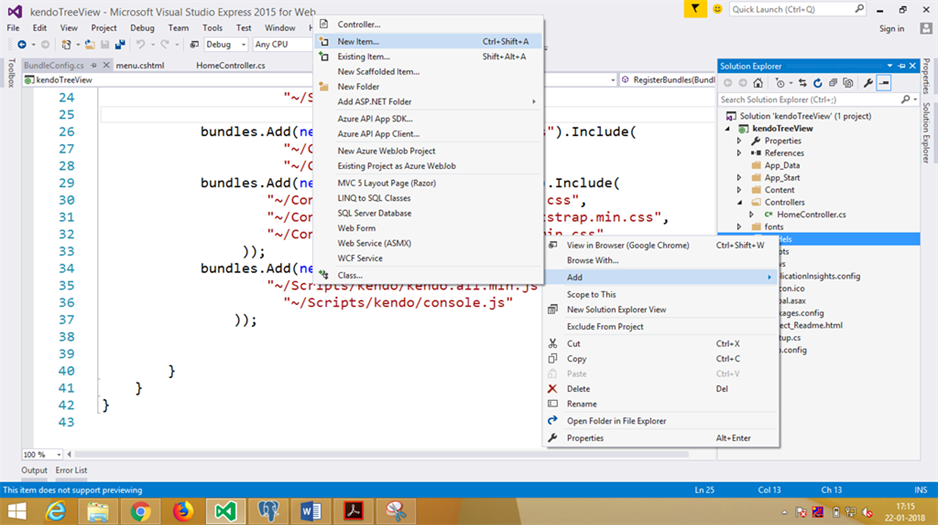
Create a User Model in the Models folder. Right-click on Models folder -> click Add -> select Class.


Paste the below code in UserModel.
- public class UserModel
- {
- public int userid { get; set; }
- [Required(ErrorMessage =”Email id Is required”)]
- public string email { get; set; }
- [Required(ErrorMessage = “Mobile Number Is required”)]
- public string mobile { get; set; }
- [Required(ErrorMessage = “Password Is required”)]
- public string password { get; set; }
- [Required(ErrorMessage = “Confirm Password Is required”)]
- [Compare(“password”, ErrorMessage = “Password and Confirmation Password must match.”)]
- public string confirmpassword { get; set; }
- [Required(ErrorMessage = “Date Of Birth Is required”)]
- public string dob { get; set; }
- }
Create a class Datalayer.cs and paste it.
Right-click on Models folder ->click Add-> select Class.

Paste the below code in DataLayer.cs.
- using System;
- using System.Collections.Generic;
- using System.Linq;
- using System.Web;
- using RabbitMQ.Client;
- using RabbitMQ.Util;
- using System.Web.Mvc;
- using ChatApplication.Models.HelperBll;
- using System.Web.UI.WebControls;
- namespace ChatApplication.Controllers
- {
- public class HomeController : Controller
- {
- DataLayer dl = new DataLayer();
- // GET: Home
- public ActionResult Index()
- {
- if (Session[“userid”]==null)
- {
- return RedirectToAction(“login”);
- }
- else
- {
- return View();
- }
- }
- [HttpPost]
- public JsonResult sendmsg(string message,string friend)
- {
- RabbitMQBll obj = new RabbitMQBll();
- IConnection con = obj.GetConnection();
- bool flag = obj.send(con, message,friend);
- return Json(null);
- }
- [HttpPost]
- public JsonResult receive()
- {
- try
- {
- RabbitMQBll obj = new RabbitMQBll();
- IConnection con = obj.GetConnection();
- string userqueue = Session[“username”].ToString();
- string message = obj.receive(con, userqueue);
- return Json(message);
- }
- catch (Exception)
- {
- return null;
- }
- }
- public ActionResult login()
- {
- return View();
- }
- [HttpPost]
- public ActionResult login(FormCollection fc)
- {
- string email = fc[“txtemail”].ToString();
- string password = fc[“txtpassword”].ToString();
- UserModel user = dl.login(email, password);
- if (user.userid > 0)
- {
- ViewData[“status”] = 1;
- ViewData[“msg”] = “login Successful…”;
- Session[“username”] = user.email;
- Session[“userid”] = user.userid.ToString();
- return RedirectToAction(“Index”);
- }
- else
- {
- ViewData[“status”] = 2;
- ViewData[“msg”] = “invalid Email or Password…”;
- return View();
- }
- }
- [HttpPost]
- public JsonResult friendlist()
- {
- int id = Convert.ToInt32(Session[“userid”].ToString());
- List<UserModel> users = dl.getusers(id);
- List<ListItem> userlist = new List<ListItem>();
- foreach (var item in users)
- {
- userlist.Add(new ListItem
- {
- Value = item.email.ToString(),
- Text = item.email.ToString()
- });
- }
- return Json(userlist);
- }
- }
- }
Create a class RabbitMQBll.cs to handle the Rabbitmq operations (connection, send and receive). Right-click on Models folder -> click Add -> select Class.

Paste the below code in RabbitMQBll.cs.
- using System;
- using System.Collections.Generic;
- using System.Linq;
- using System.Web;
- using RabbitMQ.Client;
- using RabbitMQ.Util;
- using RabbitMQ.Client.Events;
- using System.Text;
- namespace ChatApplication.Models.HelperBll
- {
- public class RabbitMQBll
- {
- public IConnection GetConnection()
- {
- ConnectionFactory factory = new ConnectionFactory();
- factory.UserName = “”;
- factory.Password = “”;
- factory.Port = 5672;
- factory.HostName = “localhost”;
- factory.VirtualHost = “/”;
- return factory.CreateConnection();
- }
- public bool send(IConnection con,string message,string friendqueue)
- {
- try
- {
- IModel channel = con.CreateModel();
- channel.ExchangeDeclare(“messageexchange”, ExchangeType.Direct);
- channel.QueueDeclare(friendqueue, true, false, false, null);
- channel.QueueBind(friendqueue, “messageexchange”, friendqueue, null);
- var msg = Encoding.UTF8.GetBytes(message);
- channel.BasicPublish(“messageexchange”, friendqueue, null, msg);
- }
- catch (Exception)
- {
- }
- return true;
- }
- public string receive(IConnection con,string myqueue)
- {
- try
- {
- string queue = myqueue;
- IModel channel = con.CreateModel();
- channel.QueueDeclare(queue: queue, durable: true, exclusive: false, autoDelete: false, arguments: null);
- var consumer = new EventingBasicConsumer(channel);
- BasicGetResult result = channel.BasicGet(queue: queue, autoAck: true);
- if (result != null)
- return Encoding.UTF8.GetString(result.Body);
- else
- return null;
- }
- catch (Exception)
- {
- return null;
- }
- }
- }
- }
Add the below code in Views -> Index.cshtml.
Right-click on Index method in HomeController ->Add View.
Give the Index name.
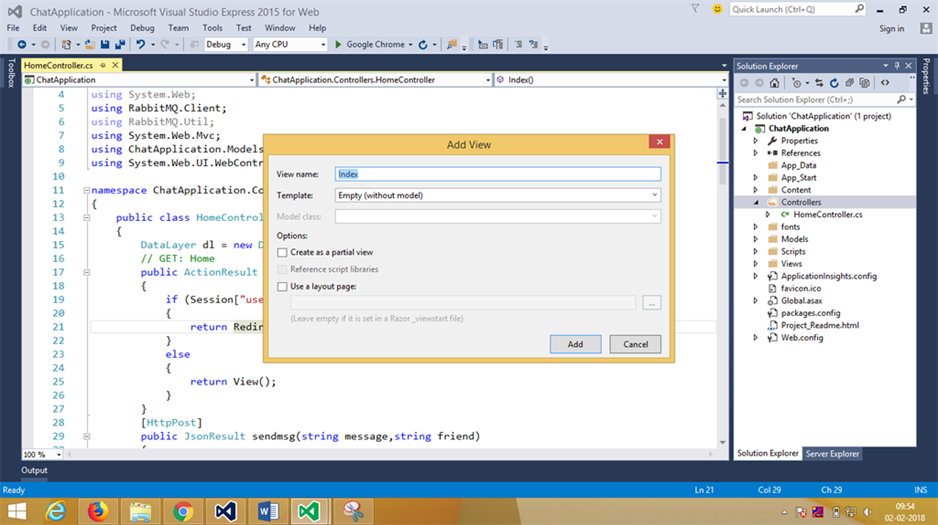
Paste the below code in View.
- @using System.Web.Optimization
- @{
- Layout = null;
- }
- <!DOCTYPE html>
- <html>
- <head>
- <meta name=”viewport” content=”width=device-width” />
- <title>Index</title>
- @Styles.Render(“~/Content/css”)
- @Scripts.Render(“~/bundles/jquery”)
- @Scripts.Render(“~/bundles/bootstrap”)
- <script type=”text/javascript”>
- $(document).ready(function () {
- $(“#btnsend”).click(function () {
- send();
- });
- getmyfriends();
- function getmyfriends()
- {
- $.ajax({
- type: “POST”,
- url: “@Url.Action(“friendlist”)”,
- contentType: “application/json; charset=utf-8”,
- data: ‘{}’,
- dataType: “json”,
- success: function (r) {
- var ddlfrined = $(“[id*=ddlfriend]”);
- // ddlfrined.empty().append(‘<option selected=”selected” value=”0″>select</option>’);
- for (var i = 0; i <r.length; i++) {
- ddlfrined.append($(“<option></option>”).val(r[i].Value).html(r[i].Text));
- }
- },
- error: function (r) {
- alert(“error”);
- }
- });
- }
- setInterval(function () {
- $.ajax({
- type: “POST”,
- contentType: “application/json; charset=utf-8”,
- data: ‘{}’,
- url: “@Url.Action(“receive”)”,
- dataType: “json”,
- success: function (response) {
- var data = $(“#divmsg”).html();
- $(“#divmsg”).html(data + “<br>Friend:” + response);
- },
- error: function (response) {
- }
- });
- }, 5000);
- function send() {
- var message = $(“#txtmsg”).val();
- var friend = $(“#ddlfriend”).val();
- var data = $(“#divmsg”).html();
- $(“#divmsg”).html(data + “<br>Me:” + message);
- $(“#txtmsg”).val(“”);
- debugger;
- $.ajax({
- type: “POST”,
- contentType: “application/json; charset=utf-8”,
- data: ‘{“message”:”‘ + message + ‘”,”friend”:”‘+friend+'”}’,
- url: “@Url.Action(“sendmsg”)”,
- dataType: “json”,
- success: function (response) {
- var data = $(“#divmsg”).html();
- $(“#divmsg”).html(data + “<br>Me :” + message);
- },
- error: function (response) {
- }
- });
- }
- });
- </script>
- </head>
- <body>
- <nav class=”nav navbar-default”>
- <div class=”navbar-brand”>
- <span style=”float:right;”>@Session[“username”].ToString()</span>
- </div>
- </nav>
- <br />
- <div class=”clearfix”></div>
- @using (Html.BeginForm())
- {
- <div class=”container”>
- <div class=”row”>
- </div>
- <div class=”row”>
- <div class=”col-md-4″>
- <div class=”form-group”>
- <select id=”ddlfriend” name=”ddlfriend” class=”form-control”>
- </select>
- </div>
- <div class=”form-group”>
- <input type=”text” name=”txtmsg” id=”txtmsg” class=”form-control” />
- </div>
- <div class=”form-group”>
- <input type=”button” value=”send” class=”btn btn-success” name=”btnsend” id=”btnsend” />
- </div>
- </div>
- <div class=”col-md-6″>
- <div class=”panel panel-success”>
- <div class=”panel-heading”>
- <div class=”panel-title”>
- Messages
- </div>
- <div class=”panel-footer” style=”min-height:400px;”>
- <div id=”divmsg”>
- </div>
- </div>
- </div>
- </div>
- </div>
- </div>
- </div>
- }
- <div>
- </div>
- </body>
- </html>
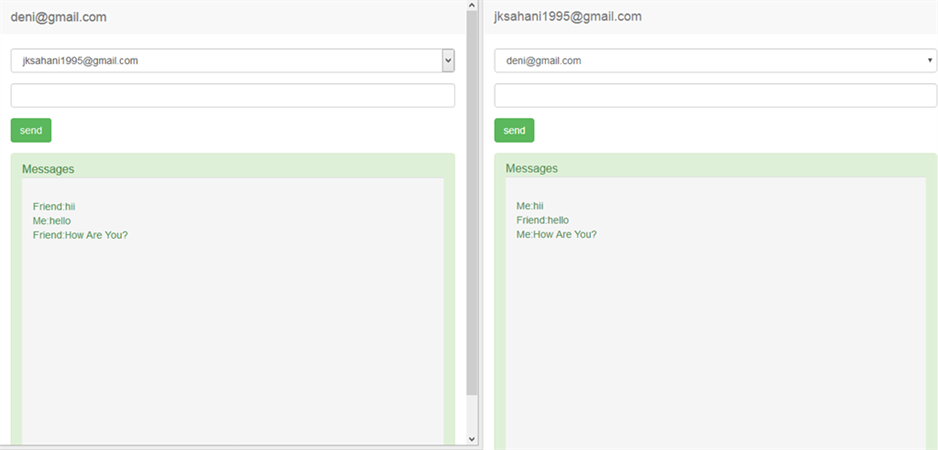
Press F5 to Build and Run the project.
I hope you liked the article. If you have any query, please feel free to post in the comments section.
Magnificent beat ! I would like to apprentice even as you amend your web site, how could i subscribe for a blog web site? The account aided me a acceptable deal. I had been tiny bit familiar of this your broadcast offered vibrant transparent idea